 Both Importing and Linking have
been greatly simplified.
Both Importing and Linking have
been greatly simplified. Both Importing and Linking have
been greatly simplified.
Click File > Import or right click in the Contents Panel and browse to the document you want to import to start the process.
You don't have to have any version
of Word installed on your computer. You can import any Word document created
in Word 2013 or higher and saved in DOCX format.
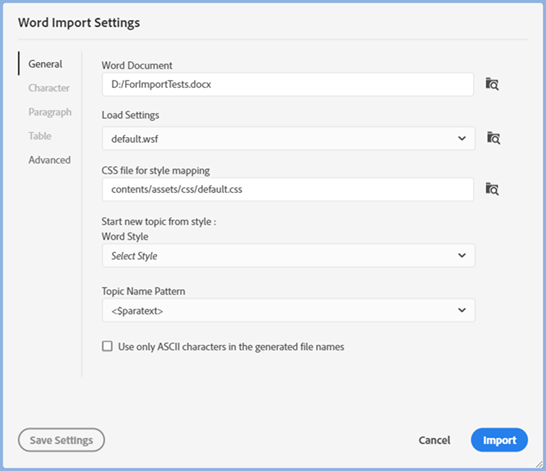
Initially use the default.wsf (Word Settings File) and browse to the document to be imported. As soon as you have selected the document, in the bottom right corner of the window you will see Sirera Help 2019 reads the document after which you can proceed with the other settings.
Select the CSS file to be used for mapping and select the style to be used as the break point if you want separate topics based on a style.
 If you use one CSS file for
your topics, automapping (described below) works best if you use that
CSS file here.
If you use one CSS file for
your topics, automapping (described below) works best if you use that
CSS file here.
Set the Topic Name Pattern if you want something other than the default.
Before looking at the remaining settings, you need to understand how automapping works. Sirera Help 2019 attempts to automap styles where it can match the name in the Word document with a style in the CSS defined for style mapping. Against each style in Character, Paragraph and Table settings you will see how the styles have been mapped.
You then have the option to change any of the mappings by clicking the dropdowns.
Using the dropdowns, you can change the styles that automapping has applied.
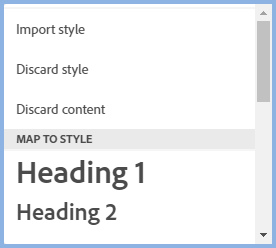
If any styles cannot be mapped because they are unique to the Word document, the Mapped Style dropdown will allow you choose Import Style, Discard Style or Map to Style.
Discard Style maps any style in Word, including headings, to the <p> tag in the CSS used for style mapping.
Import Style will create the style in a second CSS with the name in the format <word_doc_name.css>.
Under Map to Style, you will see the styles defined in your CSS.
There is also an option to map to Pre to format text that looks like code.
A new Discard Content option allows you to discard any content with the selected Word style.
The styles that can be mapped will be applied in the topic(s) created and will use the definitions in the style mapping CSS that will be linked to the topic. Going forward, any changes to your CSS would then be applied to the mapped styles in the imported topic(s) in the same way as all other topics.
If you have styles in Word and
want to change them in RoboHelp after
importing, add a style to your CSS with a name such as Reformat and set
the font for that with a garish color. Then map those styles to Reformat.
After the import you can go through the topic(s) created and apply different
styles as required. The garish color will make them easy to find.
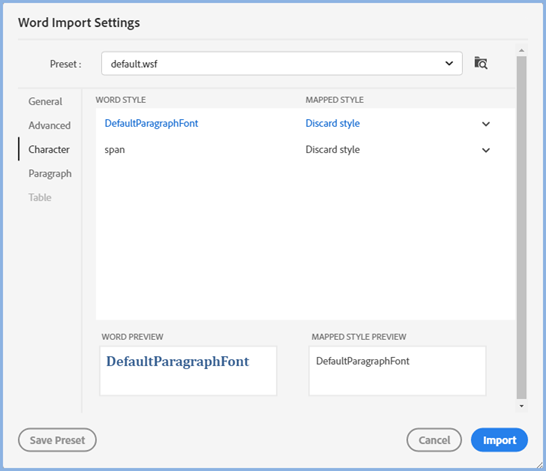
Here you set the Mapped Style settings in Automapping above as required.
Word documents retain many styles
that are not used in the document, especially documents that have been
worked on by many people. Previously all the style would have appeared
here for mapping. In Sirera Help 2019
only the styles in use will appear.
Here there are no character styles in the CSS and the desired result
is to use the <p> tag in RoboHelp. That is what will happen using
Discard Style.
Here you set the Mapped Style settings in Automapping above as required.
Word documents retain many styles
that are not used in the document, especially documents that have been
worked on by many people. Previously all the style would have appeared
here for mapping. In Sirera Help 2019
only the styles in use will appear.
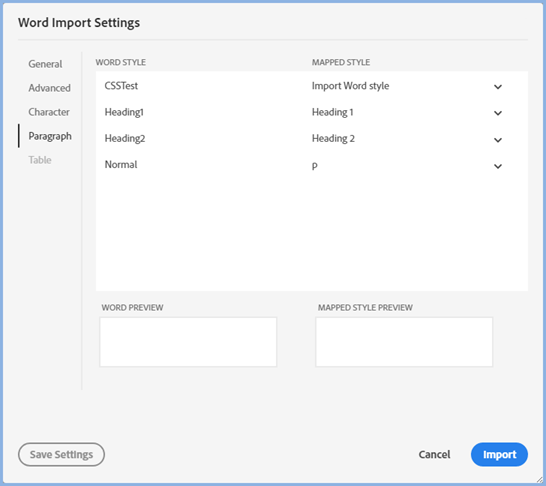
Here Sirera Help 2019
has automapped Heading 1, Heading 2 and Normal. CSSTest has not been found
in the CSS file used for style mapping so Import Word Style has been suggested.
You can either select a style from the dropdown or apply Discard Style
when any paragraph in the Word document will be set to <p> in your
topic.
Any tables in your Word document can be mapped to table styles defined in your CSS.
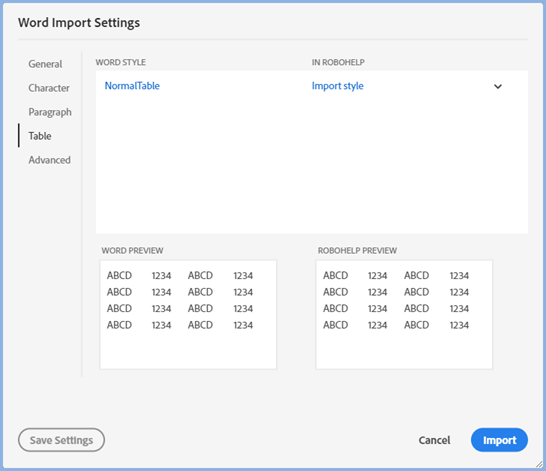
In most cases the settings below will work best.
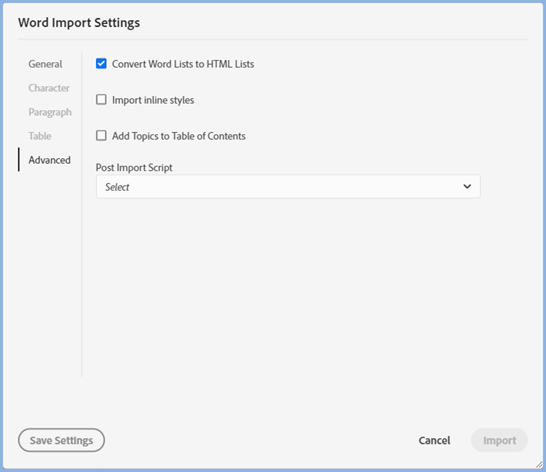
With updates applied, you will see all the above settings.
In most cases it is best to select the Convert Word Lists to HTML Lists check box.
If you select Add Topics to Table of Contents, you will be able to create a new TOC or add to an existing TOC. A page will be created in the TOC for each topic created on import.
Supplied scripts or your own scripts can be set to run automatically after import.
Before you click Import, if you have made any changes to the settings that you want to use again, click Save Settings. Each time you import, the last WSF file saved will appear but you can choose any other configuration you have saved.
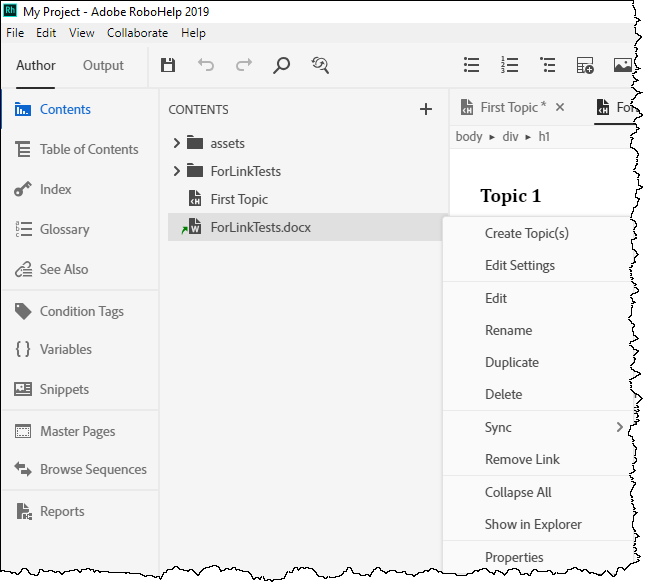
Simply right click in the Contents Panel and select Link > Link File and browse to any DOCX file.
When the DOCX file is displayed in the Contents Panel, hover over it and select Create Topic(s) in the Options menu and your topic(s) will be created. The settings for the linked document will be the wsf file defined in Project Settings.
There is a menu option Edit Settings as below. Click that to change
the settings that will be applied to the default wsf file as defined in
Project Settings.
FrameMaker import and linking is included with Sirera Help 2019. You need FrameMaker 2019 Update 3. It works in broadly the same way as Word described above.