 Sirera Help 2019
ships with an optimized PDF master page for use with Printed Documentation.
It is explained in Printed
Documentation Output.
Sirera Help 2019
ships with an optimized PDF master page for use with Printed Documentation.
It is explained in Printed
Documentation Output.If you want certain information to appear as a header or footer in your topics, you can use master pages to save you creating that content in every topic. This can include standard text and various placeholders for features such as breadcrumbs.
Sirera Help 2019
ships with an optimized PDF master page for use with Printed Documentation.
It is explained in Printed
Documentation Output.
Click the Master Page icon in the Project Toolbar and then click the + icon alongside Master Pages in the Project Component Panel. Enter a name for the master page in the dialog that appears and then your master page opens ready to be set up.
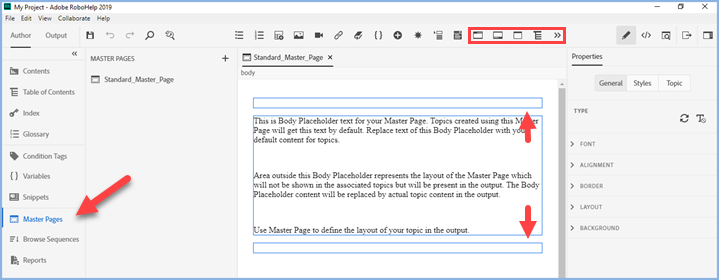
Additional icons will be displayed in the standard toolbar above. These allow you to switch between editing the header and footer and to insert various placeholders such as breadcrumbs. Hover over each one to see what it does.
You can enter text in the header and/or footer in the usual way and you can format it in the Properties panel.
 If you only use one master page
and want it applied to all topics, you don't have to apply it to each
one. When you generate an output there is an option to apply a master
page in the settings.
If you only use one master page
and want it applied to all topics, you don't have to apply it to each
one. When you generate an output there is an option to apply a master
page in the settings.
If you have set a different master page for any topic, the master page
in the preset will override that. That can be useful in some scenarios.
When creating a master page you can apply a CSS style sheet to it. When you generate an output, the hierarchy will be:
Where topics have master pages applied but no master page is defined in the preset, the CSS of the master page(s) set in the topics will apply. If there are topics without a master page defined, they will display using their own CSS.
Where a master page is defined in a preset, that will override the CSS of both the topics and the master page(s) applied to them.
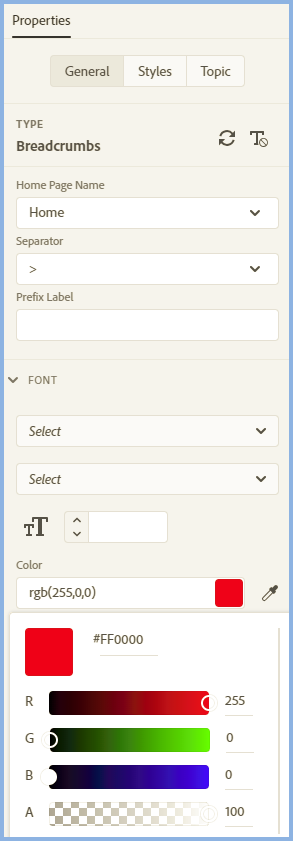
To add breadcrumbs to a master page, place the cursor where you want the breadcrumbs to be positioned and click the breadcrumb icon on the toolbar.
![]()
To format the breadcrumbs click in the breadcrumbs in the master page
and go to Properties. Check the type is "Breadcrumbs" and edit
as required in the General settings.
You can open a Master Page to edit its properties or you can right click the master page in the Master Page Panel to see its Properties without opening it.